

Your QORLYNT handbook.
Set up bookings, embed webchat and plan your team. Find the right guide and work through each step to the result.
21 / 21 topics found
Available features depend on your plan, role and connected providers.
Content reviewed: 23 October 2026
What would you like to do?
Jump to a workflow with steps, an expected result and help if something gets stuck.
New to QORLYNT?Start step by step
Get started in five steps
- Choose a plan and create your account.
- Set up business details, opening hours and services.
- Connect calendars, staff and messaging channels.
- Test bookings, emails and reminders with your own test contacts.
- Share your booking link and manage your day from one workspace.
Daily work, absences & appointment gaps
Spot open work and stay in control of appointment changes.
In your account: Today / Appointment operations · availability depends on plan
Open guide
All settings & details
- Daily overview
- Today shows upcoming work and open items. Continue to Calendar, Messages or Team from there. Dismissing an issue does not fix a sending or calendar error.
- Employee absence
- Record the affected person’s absence, review appointment conflicts and check proposed changes before applying them. Cases without a solution remain open for follow-up.
- Waitlist from Pro
- Choose a contact, service, channel, suitable template and time window. Offers do not reserve an appointment; availability is checked again when booking.
- Group appointments from Pro
- Group on-site appointments by a contact field such as postal code. This does not calculate street routes or travel times. Agree changes with customers before using replanning.
- Review replanning
- Add alternatives to a plan and review the preview. Apply only the agreed plan; availability is checked again when saving.
Appointments & calendars
Appointments, availability and team members in one view.
In your account: Calendar
Open guide
Set up the calendar for your working day
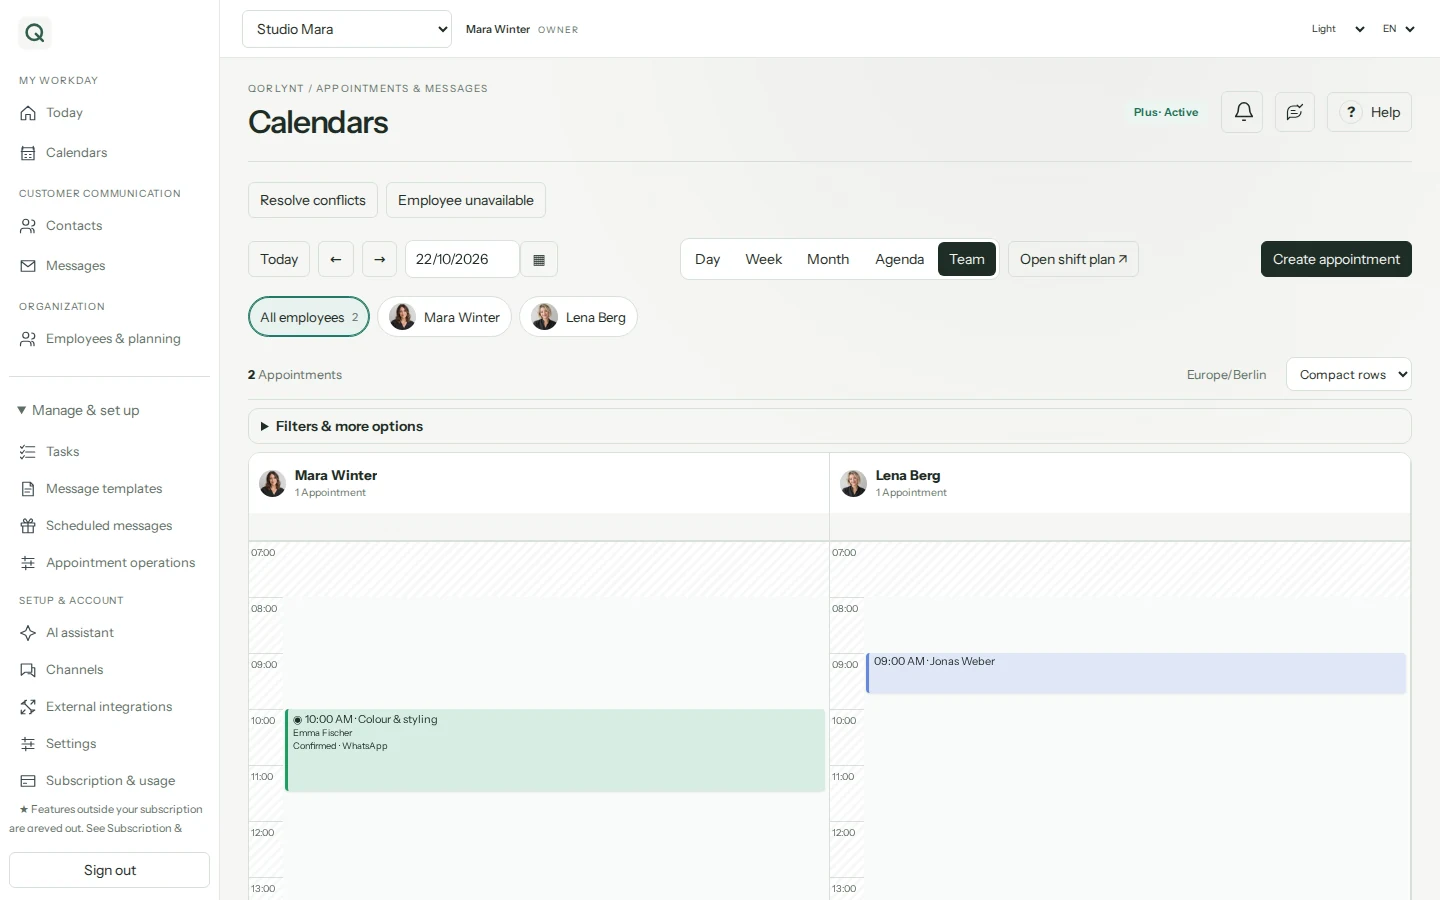
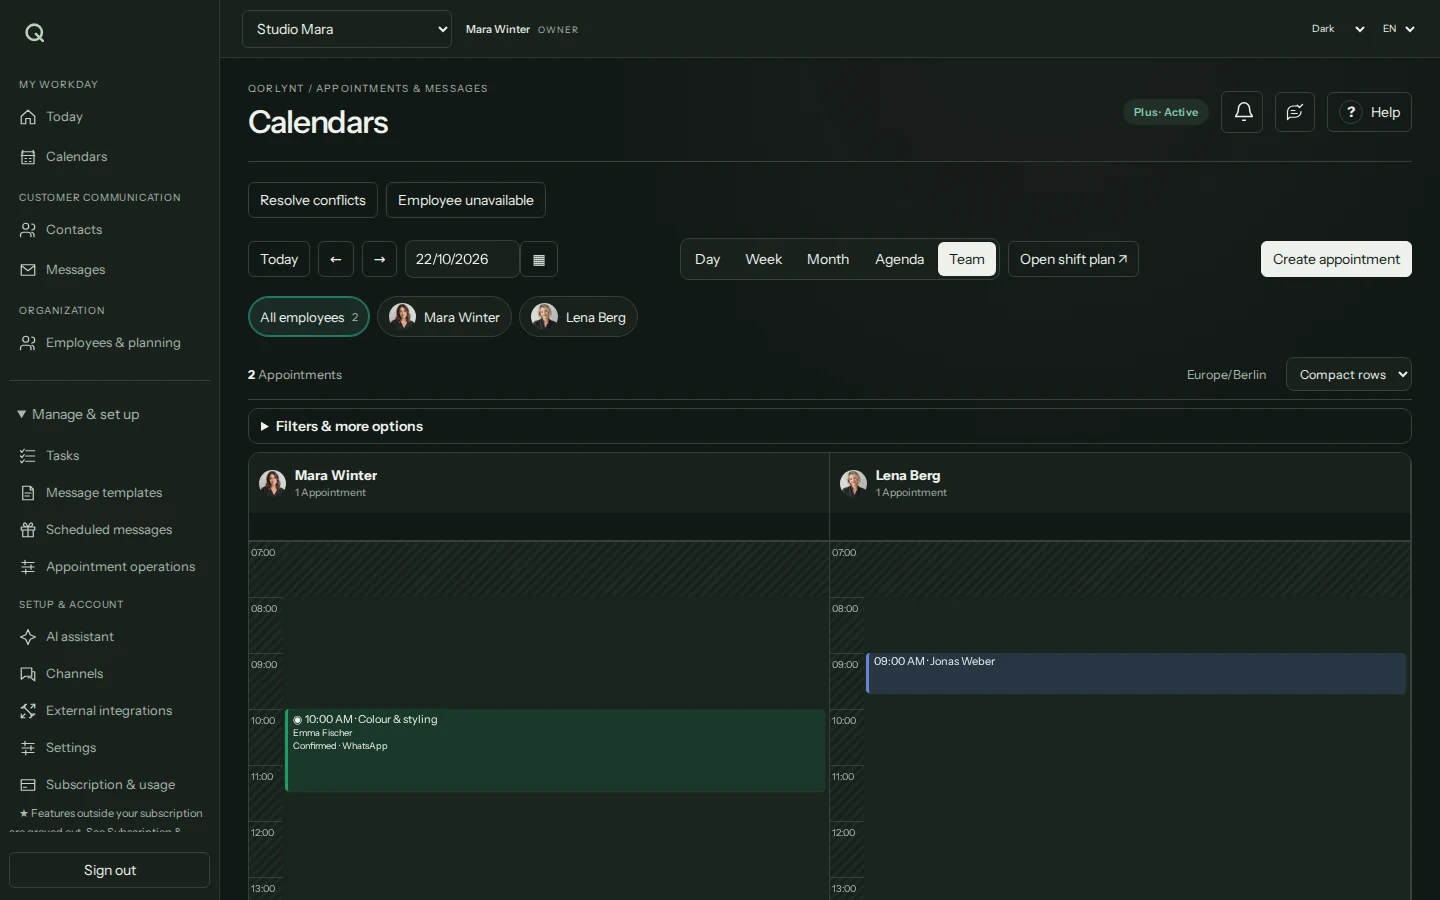
Open day, week, month, agenda or team view. Use the employee filter to focus on one person.
Select the people to display in team view. Choose compact rows for an overview or the larger display for more detail.
Open an appointment or choose an available time. Check service, employee and duration before saving.
See relevant appointments and pending approvals in the selected view.
All settings & details
- Calendar display
- The current-time line and counts of filtered appointments and pending approvals help with orientation. Employee selection and row density apply to the current calendar view.
- Views & filters
- Day, week, month, agenda and – with team features – team view. Filter employees or show them as columns. Search, status filters and compact or larger rows help you focus.
- Manage appointments
- Open details, reschedule or cancel. Deleting requires two confirmations; connected calendars receive the change.
- Absences
- Align leave, sickness and other absences with working hours. The calendar displays affected working time; booking validation accounts for the full absence.
- Connected calendars
- Connect Google or Microsoft, choose a calendar and resource, configure availability checks and booking transfer. Connections appear below the calendar.
Business & booking settings
Control when and how your business accepts appointments.
In your account: Settings
Open guide
Confirm appointments only after your approval
Enable manual approval in booking settings and set the notification recipient.
Request an appointment with your own test contact and complete email verification. The request is not a final confirmation yet.
Review the pending appointment and approve or decline it. Then check delivery of the configured notification.
Final confirmation follows your approval; customer and team can distinguish the status.
All settings & details
- Location & change deadline
- Set a booking location. For online changes, choose the previous-day rule, an hours-based deadline or disable online changes. The rule applies to rescheduling and cancellation.
- Business & language
- Set your business name, German/English language and business time zone.
- Opening hours
- Edit weekdays and time windows; multiple windows per day are supported.
- Online booking
- Enable or disable public booking. Choose calendar, guided or compact layout.
- Lead time
- Minimum time before a new appointment: 0–43,200 minutes.
- Booking horizon
- Offer appointments over the next 1–365 days.
- Slot spacing
- Show start times every 5, 10, 15, 20, 30 or 60 minutes.
- Staff selection
- Allow customers to select a team member.
- Manual approval
- Review bookings before final acceptance; set a separate address for approval requests.
- Internal booking emails
- Recipient for new bookings, changes and cancellations, independent of manual approval. Empty: fall back to the approval address. Both empty: no internal booking emails.
Services & staff
The right duration, the right person and time between appointments.
In your account: Services / Staff
Open guide
All settings & details
- Services
- Edit name, duration, buffer time, price, resource and preparation notes.
- Active or archived
- Search, filter, archive and reactivate services while retaining historical references.
- Staff profiles
- Maintain names, photos and short descriptions for booking, and assign services.
- Working hours
- Set availability and absences per staff member. Solo businesses do not require a separate staff profile.
Shifts, leave & team planning
See who is working, who is away and whether every work area is covered.
In your account: Employees & planning · from Plus
Open guide
Plan a working week and communicate changes
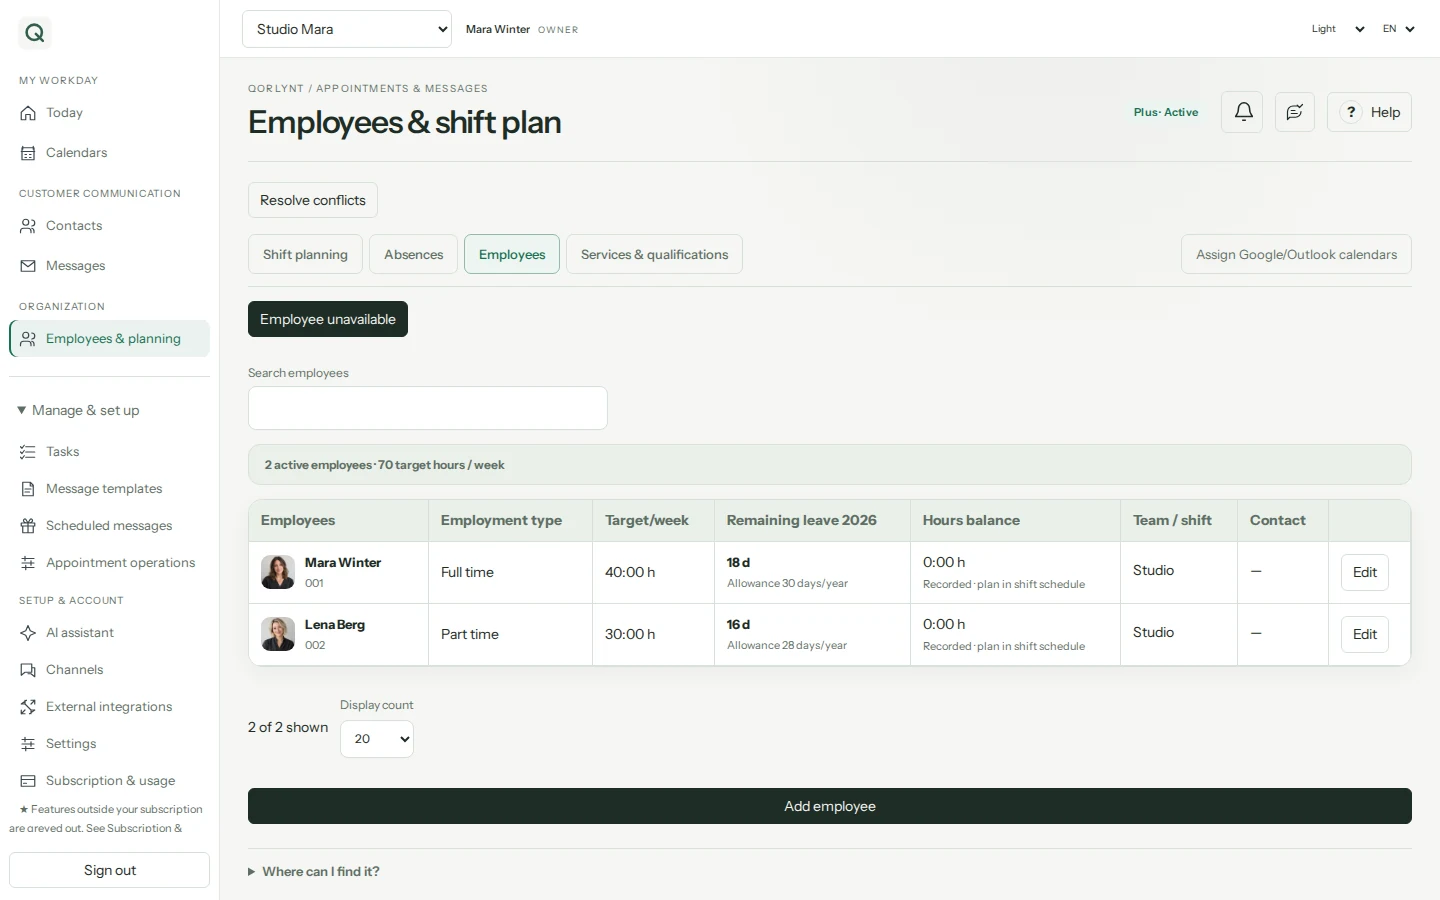
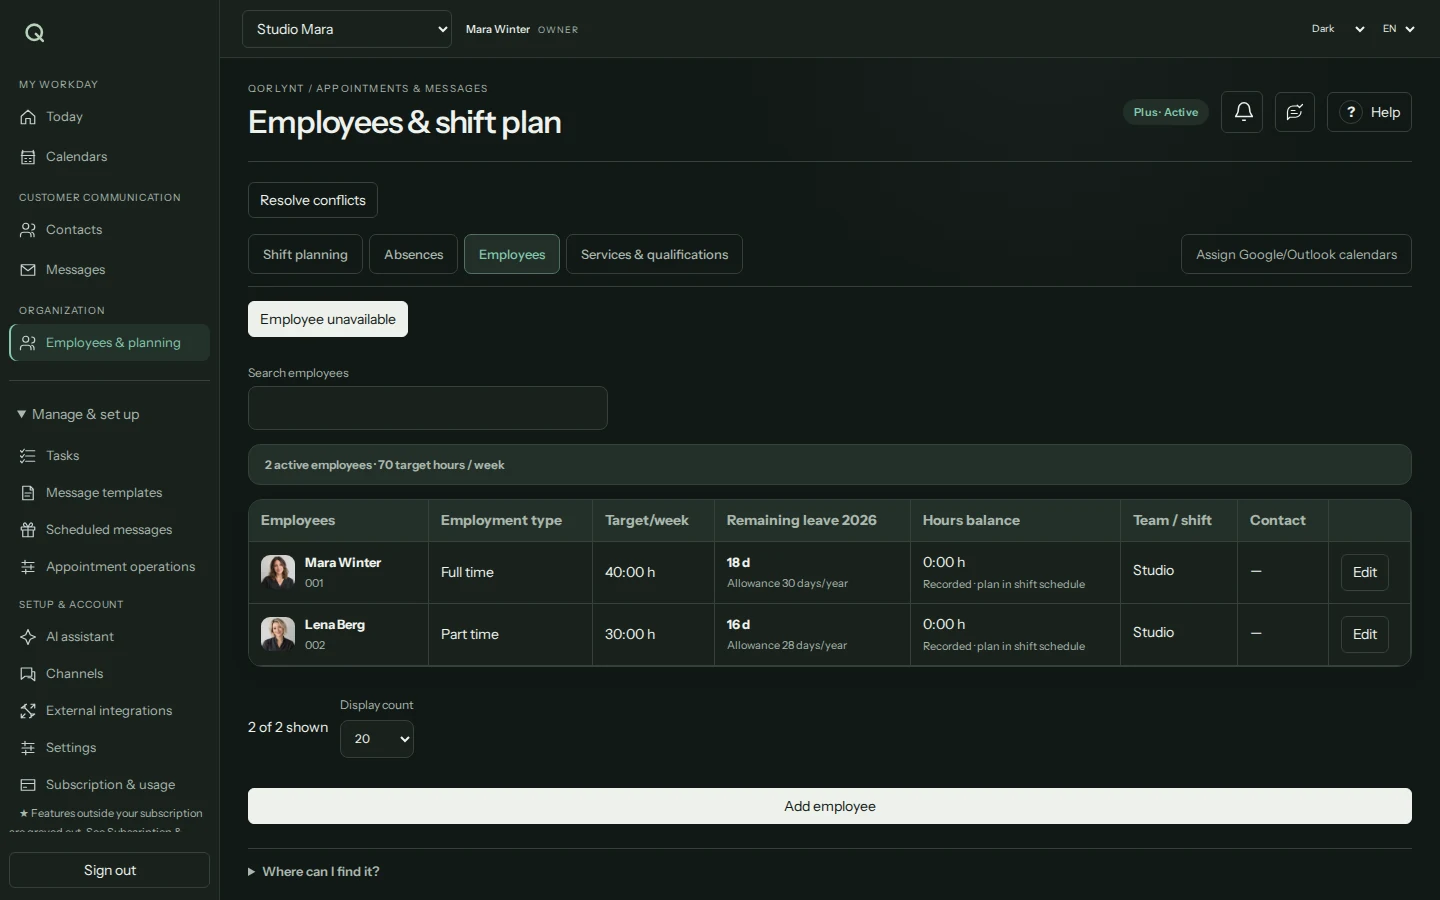
Maintain employees, working hours, services and qualifications. Enable the relevant staff for booking.
Assign shifts or use a suitable rotation. Include breaks and approved absences.
Review staffing and overlaps. For an absence, work through affected appointments and alternatives.
Review the notification preview and explicitly notify the affected employees.
A shared plan with understandable availability.
All settings & details
- Rotation & breaks
- Plan repeating shifts and weekly rotations. Consider breaks and approved absences in staffing and availability; review changes before applying them.
- Add employees
- Enter names, target hours and leave allowance, with optional email or phone. Employees do not need a QORLYNT account.
- Plan shifts
- Assign people to work areas. The coverage view shows gaps and checks overlaps, approved leave and required skills.
- Leave & absences
- Plan in the absence overview or switch to a single week. Review requests and trace leave balance entries.
- Skills
- Set required skills for each work area and see who qualifies in the matrix.
- Notify about changes
- Review the affected employees and press “Notify affected employees” when the plan is ready. Only then is a message sent by each enabled email or WhatsApp channel; missing contact details or disabled channels prevent delivery. WhatsApp requires a connected number and an approved template.
- Personal links
- Provide a calendar subscription and a personal absence request link for each person. Rotate links when needed.
Website booking & webchat
Customers can find a suitable appointment themselves.
In your account: Settings → Website & widgets
Open guide
Embed booking and webchat on your website
Configure public booking under Settings → Website & widgets. Open the booking link yourself first.
Under Webchat, choose a floating chat icon or inline chat. Set the icon label, colour and side.
Add the generated code once to the appropriate HTML area on your website. Choose the inline chat location and adjust its height if needed.
Test on your website: verify an email, send a message and check the conversation in the QORLYNT inbox. Test booking and optional approval separately.
Website and inbox share the same conversation. Customers can keep writing to the team after a handover.
All settings & details
- Embed webchat
- Under Webchat, choose a floating icon or inline chat. Configure the floating label, colour and side, then copy the generated code into your website. Open the preview and test on the real website. Replace the copied code to apply later design changes.
- Guided booking
- Choose a service, then date, optional employee and available time. A single service skips the first step. Employee selection filters one shared time grid. Verify the email address; if manual approval is enabled, the business reviews the request next.
- Chat access & handover
- Customers verify their email before chatting. AI and team replies share the same history. After a handover, customers can keep writing to the team. Expired access requires verification again.
- Confirmation & changes
- The appointment summary includes service, employee, time, saved location and the applicable change deadline. Rescheduling and cancellation follow your rules. Pending approval is not a final confirmation.
- Link & embedding
- Share the public booking link or embed the website button.
- Button appearance
- Change its label, colour and position.
- Booking flow
- Choose a service, free time and optional staff member. Verify contact by email; enabled manual approval adds a business review.
- Manage a booking
- Customers can reschedule or cancel through their management link within the booking rules.
- Webchat
- Offer chat via the public link. AI requires activation and the relevant plan allowance.
Contacts & data transfer
Customer information and consent in one place.
In your account: Contacts
Open guide
All settings & details
- Contact details
- Maintain name, email, phone number, custom fields and customer groups.
- Search & filters
- Search name, email or phone; filter by groups and consent.
- Import
- Upload Excel or CSV, map columns, review previews and validation messages, then start and check the import.
- Export
- Export contacts for further processing.
- Messaging permissions
- Manage channel consent and the general notification block separately. Import does not grant consent.
- Telegram linking
- Link a contact to your bot through a personal link. A phone number alone is insufficient.
- Delete contact
- Anonymise and remove the contact from the active database. Copies at providers or on recipient devices are not removed.
WhatsApp & Telegram
Communicate through your company’s business accounts.
In your account: Channels / Calendar
Open guide
All settings & details
- Connect WhatsApp
- Connect your business account and number using the available setup. Meta permissions and number eligibility are required.
- Check connection
- View connection, webhook and setup status; check without sending a message.
- Advanced setup
- For manual connections, use the displayed account, number and credential fields. Enter credentials only in your protected account.
- Telegram bot
- Connect your own bot. Recipients must first link to it and consent to the channel.
- Provider rules
- WhatsApp first contact and messages outside the reply window require approved Meta templates. Provider fees use your own account.
Connect email
Set up sending and receiving to suit your business.
In your account: Channels → Email
Open guide
All settings & details
- Set up sending
- Choose your own SMTP connection or the available hosted email option. For SMTP, configure sender, server, credentials and the port required by your provider. Enter credentials only in your protected account.
- Receiving is separate
- SMTP alone does not read incoming messages. Configure the available IMAP connection separately under Integrations for your own inbox and check its connection status.
- Test before launch
- Use your own test contact to check delivery and replies. A saved channel status is not a delivery guarantee. Check provider access and the displayed error if a test fails.
Inbox & templates
Keep replies and scheduled messages organised.
In your account: Messages / Message templates
Open guide
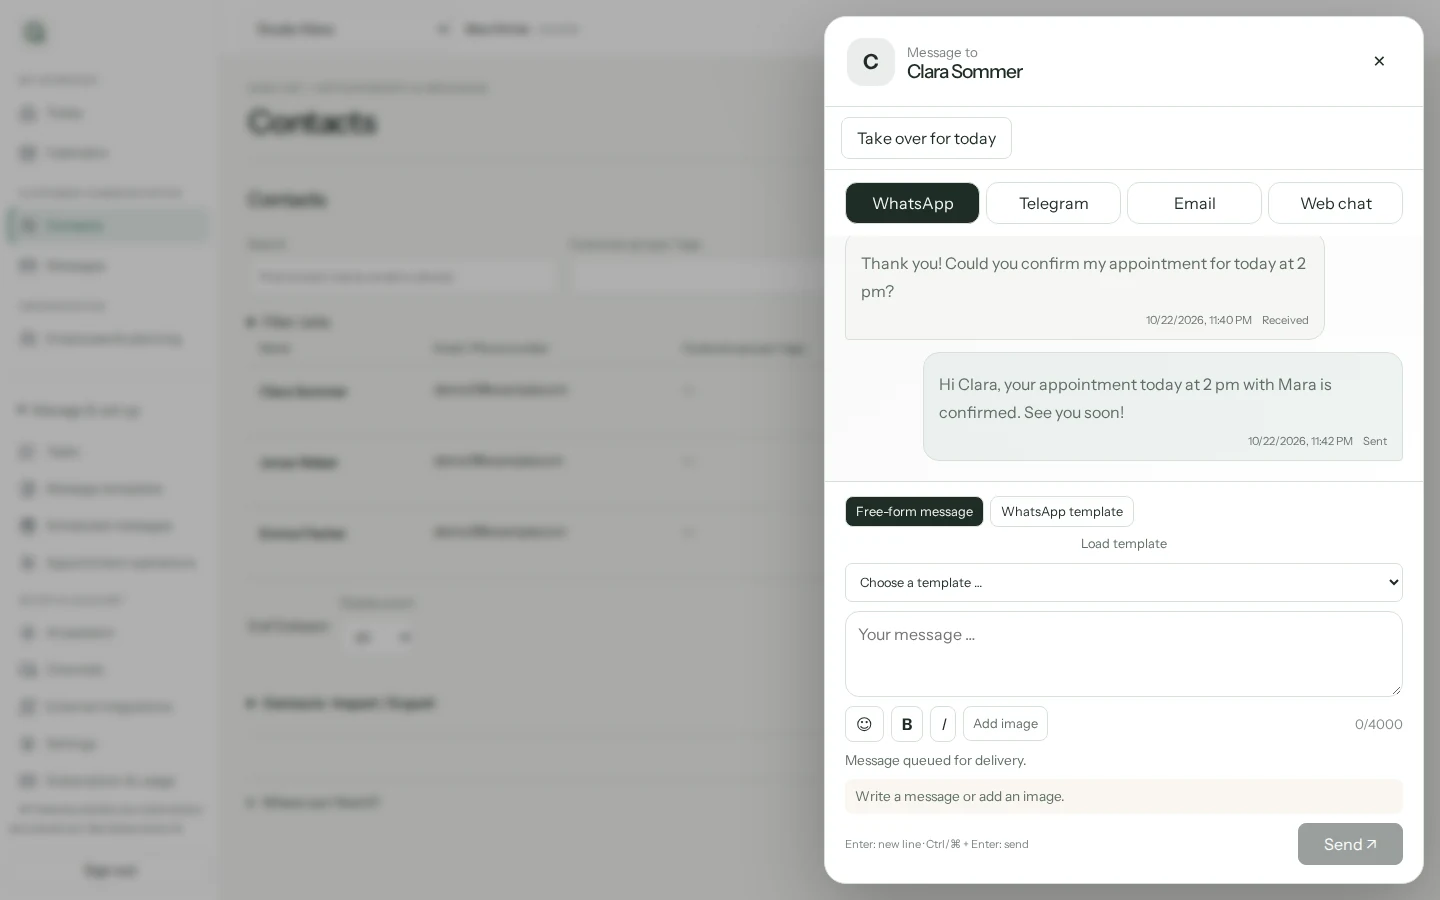
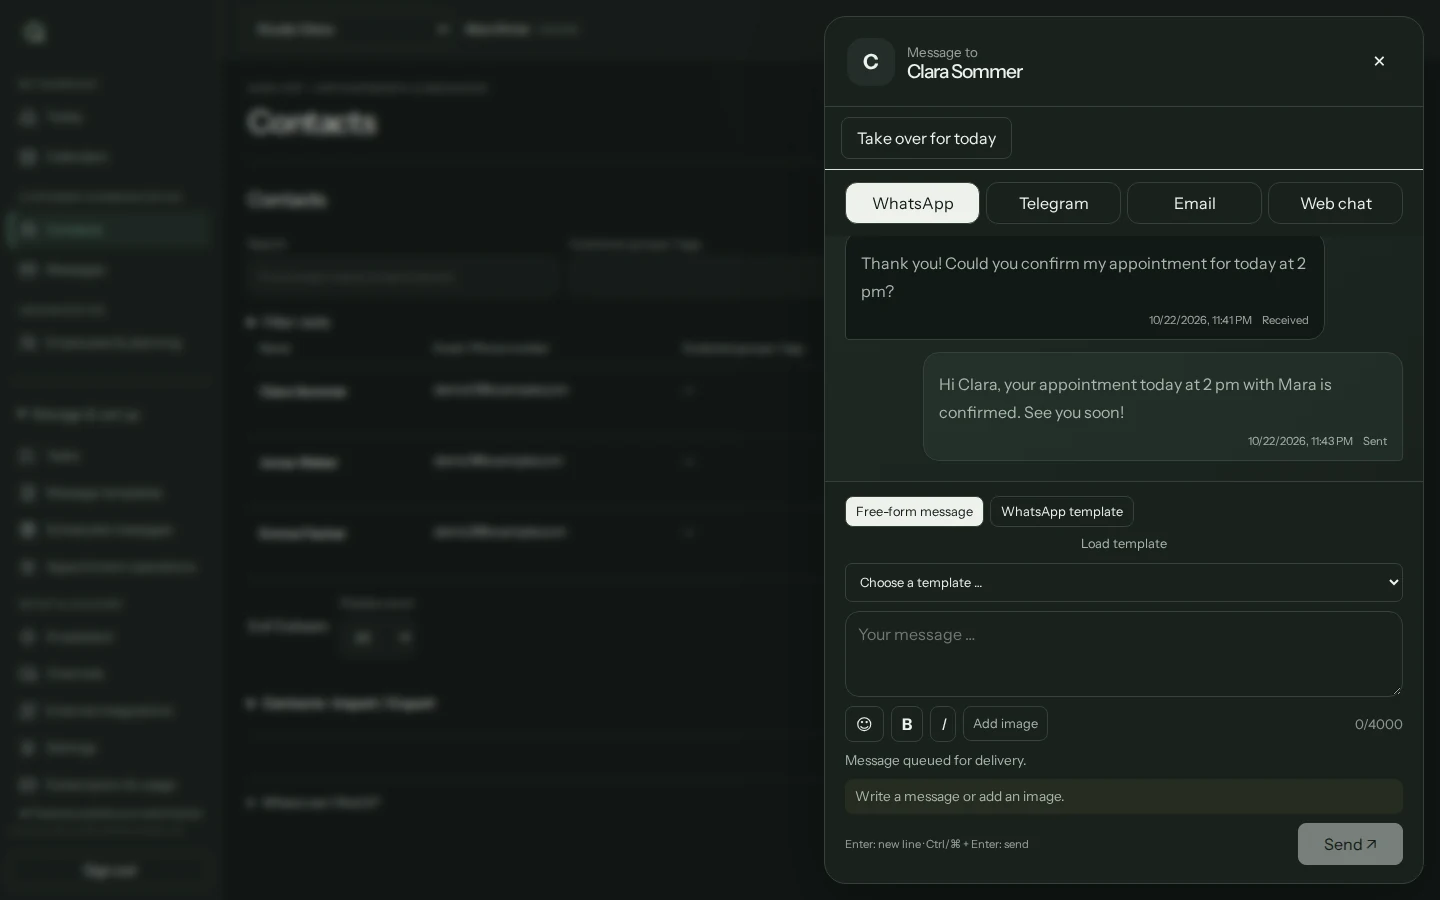
Reply personally to a customer enquiry
Open the contact in the inbox and check the channel and history. Use the paused AI filter when needed.
Choose a suitable reply or approved template. Templates remain editable; check the preview.
Send or schedule the message and review its actual delivery status. Address the displayed cause if it fails.
Customer history, personal replies and delivery status stay together.
All settings & details
- Find messages
- Search full history and filter by channel, status, direction and date range; load further entries.
- Write a message
- Find contacts independently of conversation history, choose a channel and send or schedule a permitted reply or template.
- Delivery status
- Distinguish queued, sent and failed messages. Cancel messages still waiting for dispatch.
- Edit templates
- Use text, placeholders, supported formatting, image URLs or uploads; preview and archive templates.
- WhatsApp templates
- Save your draft, open WhatsApp approval and submit a category, language and fictional examples for review. Alternatively import a supported Meta library template. Saving does not mean approval: check status and rejection reasons; edits may require another review.
Reminders & scheduled messages
Remember customers at the right moment without preparing every message manually.
In your account: Calendar → Reminders & replies / Scheduled messages
Open guide
Schedule a personal birthday greeting
Check the contact date field and permission for the intended channel.
Choose a template and check placeholders and the preview. Check WhatsApp approval when relevant.
Create an occasion-based rule with a date field, recipients, time and annual recurrence.
Check with your own test contact and review scheduled or sent messages.
Customer care follows your chosen occasion and delivery schedule.
All settings & details
- Booking triggers
- Choose reminder, confirmation, change or cancellation. Enable or disable each rule.
- Lead time & delivery
- Set 0–43,200 minutes, a channel and template. Multiple rules allow multiple reminder times.
- Booking filters
- Filter source, connection, calendar, service, staff and customer group. Avoid duplicate standard reminders.
- Occasions
- Use a fixed date or personal date field; once, annually or a field-based multi-year cycle with relative delivery days.
- Recipients & time
- Choose all eligible contacts, groups or individuals, plus time and time zone.
- Manage rules
- Edit, pause, activate or delete. Messages already accepted by the provider cannot be recalled.
Voice & AI phone answering
Let your assistant answer calls and support suitable booking workflows by phone.
In your account: Channels → Voice-Agent / Plans
Open guide
Try Voice and prepare for telephone calls
Maintain business details, services, opening hours and knowledge. Open the browser voice demo with active access or an ongoing trial.
Allow microphone access and use fictional contact details. Each business gets 20 minutes once, with up to five minutes per conversation.
For real calls, use a Voice add-on, configure a phone number and check its activation status.
Test the telephone workflow deliberately. Configure forwarding with your existing provider after successful setup.
Understand your assistant’s behaviour before configuring your phone service around it.
All settings & details
- Browser voice demo
- With active access or an ongoing trial, try 20 minutes once per business without a phone number, up to five minutes per conversation. Allow microphone access and use fictional details. Bookings and callback requests are simulated; no appointments, contacts, tasks or messages are created.
- Base plan & Voice
- Voice is a separate minutes package added to a base plan, including Basic. Staff-specific bookings require team features from Plus.
- Number & activation
- Set up Voice, provide the required phone-number information and check activation status. Calls can only be answered after setup is active.
- Knowledge & booking rules
- Maintain business information, services, opening hours and availability so the assistant can provide appropriate answers and bookings.
- Test & monitor usage
- Open a test window and call the displayed number. Test calls use minutes and may create real appointments. Then activate answering and configure forwarding with your existing phone provider. Check its charges and fallback separately. Pausing or exhausting the allowance stops new calls.
AI assistant & tasks
Support for questions, appointment requests and daily organisation.
In your account: Settings / Messages / AI assistant / Tasks
Open guide
Set up an AI handover to your team
Review business knowledge, automatic replies and the assistant’s operating schedule.
Enable optional AI handover and describe when a person should take over. Save the setting.
Try a matching situation with a test contact. Filter the inbox for paused AI and open the take-over conversation task.
Read the history, reply personally and resume AI only when it should take over again.
AI pauses for the contact; your team continues with the existing conversation history.
All settings & details
- Optional AI handover
- Enable automatic handover based on your own conditions and describe the rules. This option is off by default. A handover pauses AI for the contact and creates a take-over conversation task.
- Take over personally
- Filter the inbox for paused AI, read the history and reply personally. Resume AI deliberately; inputs received during the pause are not answered automatically afterwards. No automatic employee assignment or guaranteed response time.
- Business knowledge
- Provide information used by the assistant to answer customers.
- Automatic replies
- Enable AI for new incoming requests. Old messages are not answered retroactively; plan allowances and blocks apply.
- Conversation control
- Pause AI for a contact and take over. Proposed appointments are booked only after customer confirmation.
- Your assistant
- Ask setup questions and prepare suggestions with optional customer context. Users still save settings themselves.
- Tasks
- Review callbacks, preparation and promises; search, filter, complete and delete after confirmation.
- Advanced workflows
- Depending on the plan: refill free appointments, prepare appointments, track promises and group on-site visits. Check the plan comparison.
MCP connector & external connections
Connect your AI assistant in ChatGPT or Claude and existing business systems to QORLYNT.
In your account: External connections
Open guide
Connect your own AI assistant to QORLYNT
In QORLYNT, open External connections → MCP connector (Beta) and copy the displayed server address.
Choose ChatGPT or Claude below and add a custom MCP connection with that address. Sign-in takes you back to QORLYNT.
Sign in to QORLYNT, select the correct business and assign tool permissions. Choose the read-only preset for your first test. Review the notices and confirm the connection.
Return to your AI provider, finish setup and select QORLYNT in the chat. Describe the assistant’s role and task, for example with the starter prompt below.
Choose your AI provider
ChatGPT
Open Plugins, select + and Add custom MCP server. Enter a name and description, paste the address as a public server URL and choose OAuth authentication.
Acknowledge the notices and choose Create as a plugin. After QORLYNT authorization, review the tools, install the plugin and select it with @ in a new chat.
Claude
Open Customize → Connectors and add a custom connector through +. Name it QORLYNT and paste the server address.
Review the detected OAuth settings and sign in. If an OAuth client choice appears, choose Register automatically. After QORLYNT authorization, finish setup and enable it through + → Connectors in your chat.
Your first task
You are my planning assistant for this business. Use the permitted QORLYNT connection. Show tomorrow’s appointments and summarize available times. Ask when details are missing. Do not change anything without my explicit request, and distinguish pending approvals from completed actions.
Your assistant can retrieve permitted QORLYNT data and work with your instructions. You do not need to write code or create a separate GPT in the GPT Builder.
All settings & details
- MCP connector · Beta
- Under External connections → MCP connector, copy the displayed server address and add it as an OAuth connection in a compatible AI client. Availability also depends on the AI plan and workspace permissions.
- Tool permissions & approvals
- Select the correct business during authorization. New connections start with no tool permissions. Allow selected read tools; choose QORLYNT approval or direct execution for writes. A pending action has not executed. Business booking approval still applies.
- Manage the connection
- Review access and pending actions, change permissions, disconnect or revoke access. Revocation stops future access but does not undo data already shared or completed actions.
- Access & scope
- Availability depends on your plan or offered add-on subscription. Third-party software needs a suitable API connection.
- Configuration
- Use templates, map fields, preview examples and import/export configuration. Saving and activating are separate steps.
- REST, WebSocket & webhooks
- Exchange contacts, appointments, availability and scheduled templates through supported actions; subscribe to appointment events.
- Delivery policy
- Choose internal, combined or external triggers; explicitly set manual-send and AI-reply exceptions.
- Permissions & filters
- Enable/disable connections, rotate credentials and restrict calendars, services and staff. A generic connection is not a guaranteed vendor integration.
Team, billing & interface
Understand access and costs at a glance.
In your account: Users & permissions / Subscription & usage / Settings
Open guide
All settings & details
- Team access
- Manage users and roles within your seat allowance. Permissions are enforced server-side and features depend on role and plan.
- Plans & billing
- Paid purchases are processed through Stripe as real payments. Choose monthly or annual payment. The displayed annual price applies; allowances remain monthly.
- Usage & changes
- View your plan and allowances. Confirm plan changes in Stripe; redirection alone grants no access.
- Payment management
- Manage payment method, invoices and cancellation through the configured Stripe portal. Public cancellation is also linked in the footer.
- Appearance
- Choose German/English and light, dark or system theme, with responsive desktop and mobile layouts.
- Help
- Use the support assistant, contact and ticket form. Public documentation does not require source-code access.
Profile, security & account access
Protect your personal login and keep track of your sessions.
In your account: My profile & security
Open guide
All settings & details
- Profile and login
- Manage display name, language and theme. Change your password and verified sign-in email through the security flows; sensitive changes may require signing in again.
- Two-factor authentication
- Set up an authenticator and complete verification. Contact support for identity-checked recovery if you lose your device.
- Devices and sessions
- Review active sessions and recent security events, and end access you no longer need.
- Delete a personal account
- If you are the only active owner, appoint another owner first. Personal account deletion does not cancel a business subscription or automatically erase all business records.
App & notifications
Open QORLYNT from your home screen and stay informed on the go.
In your account: Settings → App & notifications
Open guide
All settings & details
- Install
- Use the available installation dialog. On iPhone or iPad, choose Share → Add to Home Screen in the browser.
- Enable push
- Enable notifications for the current device and grant browser permission. Check browser settings if permission is blocked. Availability depends on the device and configuration.
- Notification events
- New customer replies and appointment changes can trigger push. Device notifications are separate from reminders sent to customers.
- Internet connection
- Working with contacts, messages and appointments requires a connection. The offline page is not an offline workspace.
Webhooks & automations · Make, n8n and custom systems
Connect incoming actions and outgoing events under the same booking and delivery rules.
In your account: External connections → Webhooks & automations
Open guide
All settings & details
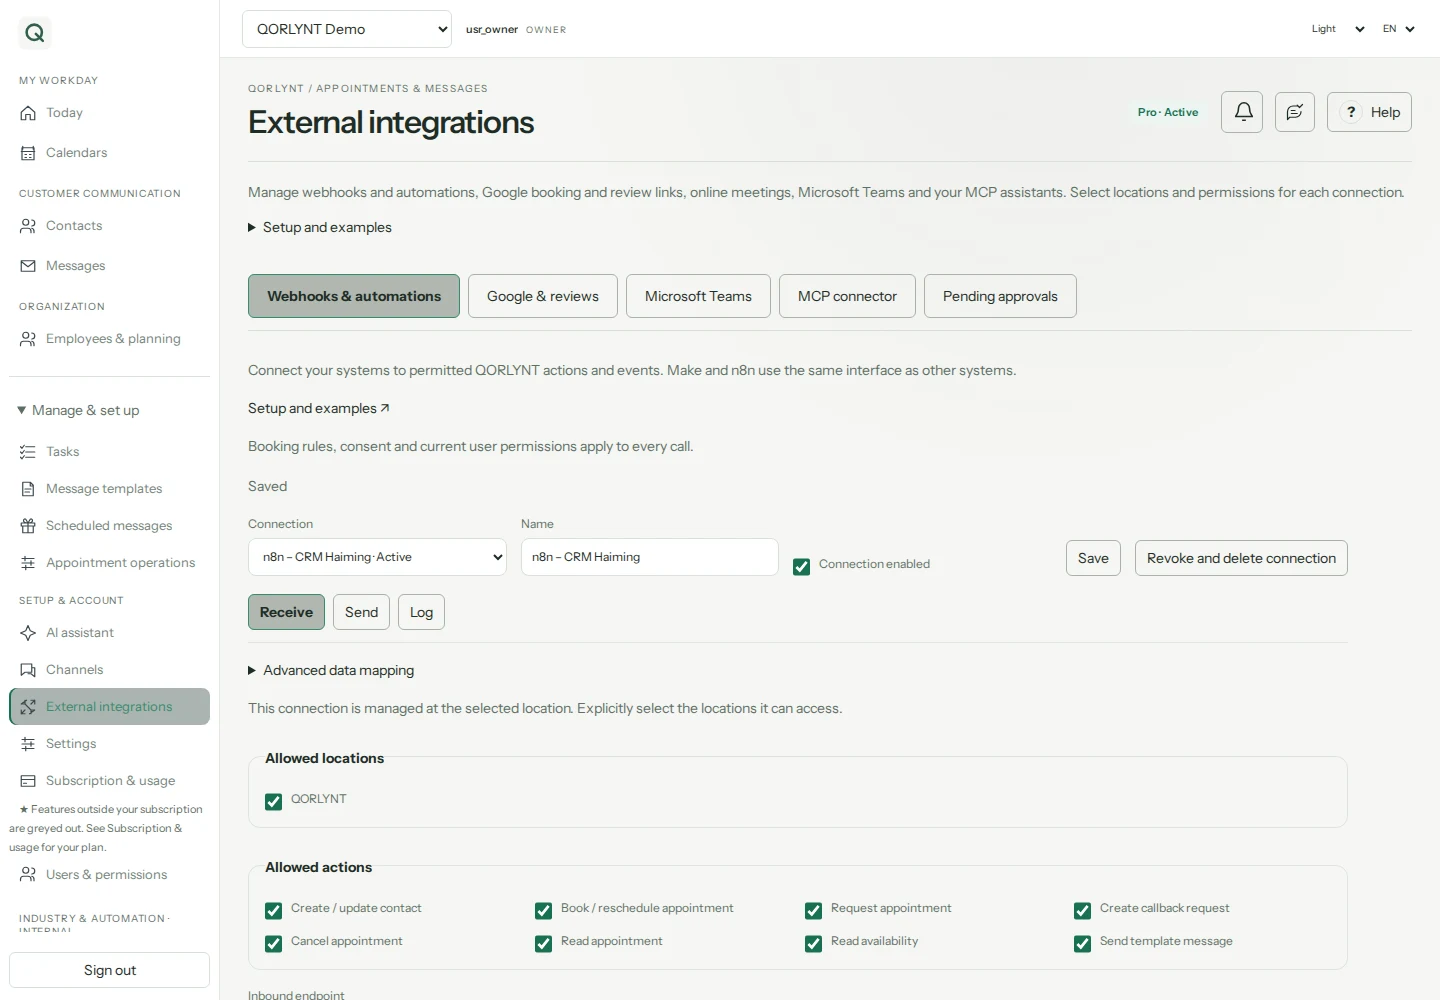
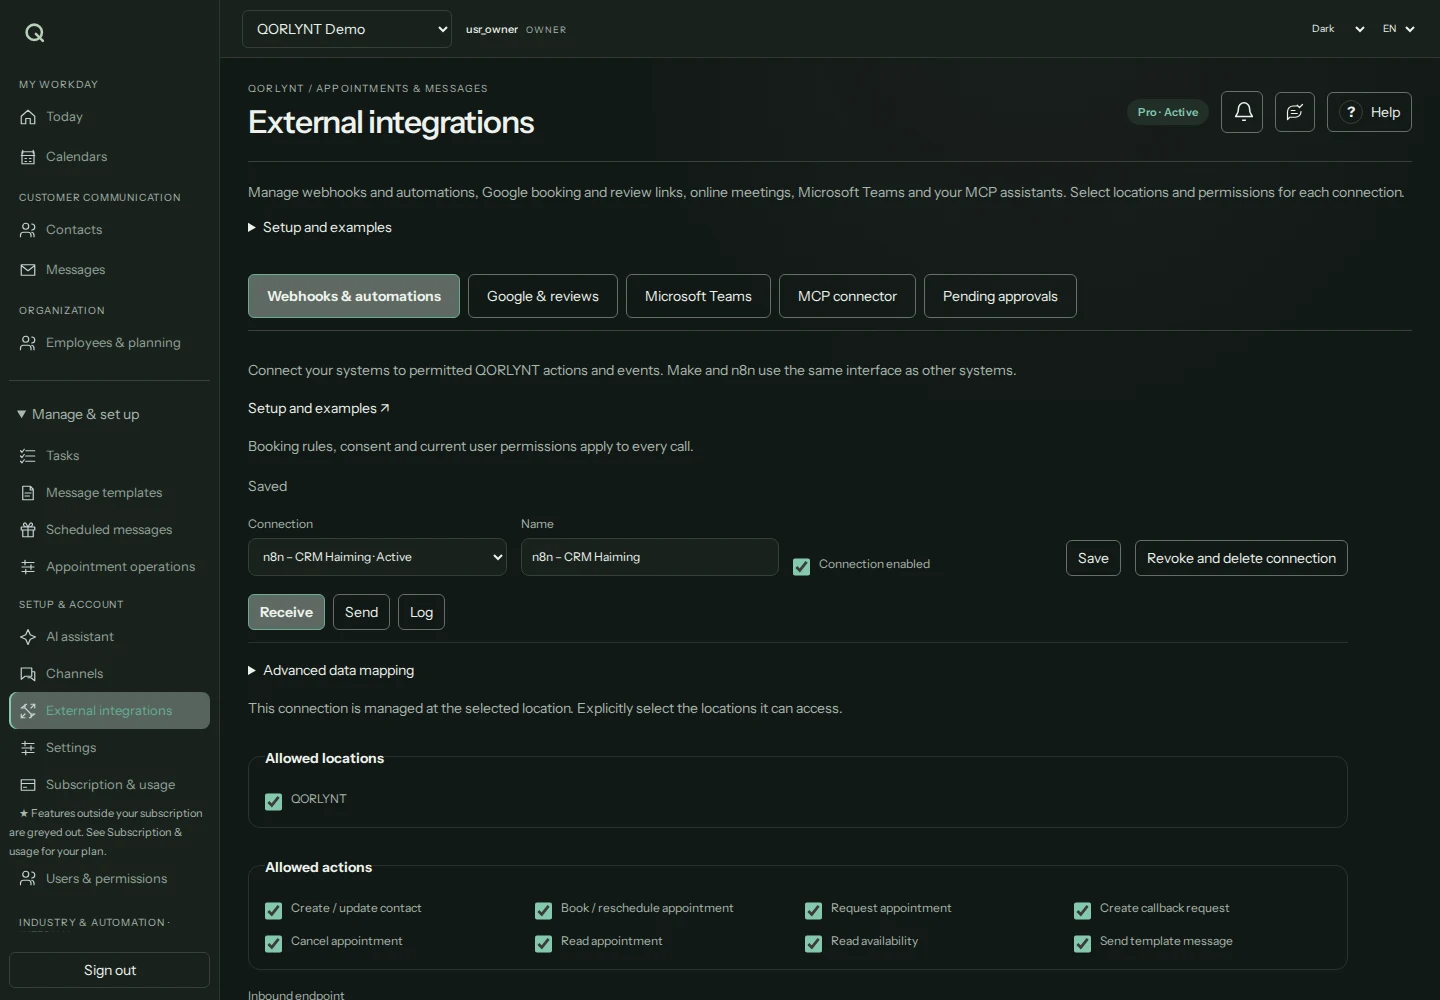
- 1 · Connection and locations
- Create a named connection such as “n8n – Haiming CRM”. Explicitly select allowed locations and actions, save, and enable it. Supply locationId when multiple locations are allowed. Management stays in the original location.
- 2 · Protect credentials
- Generate separate credentials and store them securely in your system. Send Authorization: Bearer TOKEN in the request header, never the URL. Rotation replaces previous credentials; disabling or deleting stops access. Secrets are displayed only immediately after generation.
- 3 · Contacts and duplicates
- contact.upsert uses a stable externalId and increasing version. Explicitly link an existing contact with contactId. An email or phone belonging to another contact produces CONTACT_DUPLICATE, never a silent merge. Imported contact details do not establish consent.
- 4 · Appointments and callbacks
- appointment.request creates an appointment request. appointment.upsert books or updates the mapped appointment, respecting required confirmation. appointment.cancel cancels it. callback.create adds a callback to the existing task workflow. Locations, services, staff, opening hours, absences and conflicts are checked again.
- 5 · Messages
- message.schedule schedules an existing channel template for a mapped contact. Channel readiness, consent, delivery policy and any WhatsApp template approval remain mandatory. Booking and sending are separate permissions.
- 6 · Test without side effects
- Enter a sample in Receive and run the preview. It performs the same checks in a rolled-back transaction: no contact change, booking or message persists. Then run a real request from Make, n8n or your system.
- 7 · Retries
- Reuse eventId for exactly the same request. Reusing it with changed content is rejected. externalId is the lasting mapping; increase version on changes. Do not create a new eventId after a timeout. Successful responses include the record ID and possibly pending_approval, which is not a confirmed booking.
- 8 · Send events
- Select the HTTPS target, events, location permissions and data fields in Send. Generate a signing secret and store it at the receiver. Send a test and inspect the log. Test events contain no customer data and create no bookings.
- 9 · Make and n8n
- Use a Make Custom Webhook or n8n Webhook trigger as the target. For QORLYNT actions, use an HTTP Request step with POST, JSON and the Authorization header. Deduplicate received events by x-qorlynt-event-id and verify their HMAC signature. Other systems use the same interface.
- 10 · Origin and loops
- originIntegrationId, correlationId and locationId associate requests with resulting events. Suppressing responses to the originating connection avoids direct feedback loops. Store event IDs in your workflow and avoid blindly writing every update back.
- 11 · Errors and logs
- SLOT_UNAVAILABLE means the slot is no longer available. LOCATION_REQUIRED needs a location. INTEGRATION_FILTER_DENIED or PERMISSION_DENIED needs matching permissions. Logs contain direction, IDs, status and error codes, never credentials or message bodies. Outgoing retries are bounded; failed events can be retried explicitly after fixing the problem.
- 12 · Signature and response
- x-qorlynt-signature contains t=TIME,v1=HEX. Verify HMAC-SHA256 of TIME + dot + the unchanged HTTP body, with the signing secret, a short time window and constant-time comparison. Return 2xx after durable acceptance. The test checks transport and format; end-to-end testing needs your running receiver.
Google booking links and reviews
Set up the correct booking destination and review request for each location.
In your account: Settings → Website & widgets → Google booking link & reviews · External connections → Google & reviews
Open guide
All settings & details
- Publish the booking link
- Select the location, preview and copy its booking link. Add it under Booking or Edit profile in the matching Google Business Profile. Available categories depend on the profile. The link opens this location’s QORLYNT booking page.
- Save the review link
- In Google Business Profile, open Read reviews → Get more reviews and copy the link. Save it for the matching QORLYNT location under Settings → Website & widgets or External connections → Google & reviews. Both views use the same link; saving once is enough. The link is optional and does not enable automatic delivery. Editing the link preserves existing delivery rules. QORLYNT does not buy, filter or automatically publish reviews.
- Template and consent
- Create an email, WhatsApp or Telegram template containing {{review_link}} or {{bewertungslink}}. Choose the channel and template. Automatic requests require channel and marketing consent; WhatsApp also requires the appropriate approved template.
- Timing and repetition
- Set the delay after appointment end and minimum interval per contact, then enable. Completed or ended confirmed appointments after activation are considered. Cancellations and no-shows are excluded. Each appointment creates at most one request. Retrying does not bypass missing consent.
- Monitor and disable
- Check the existing message delivery log. Changes to review settings cancel queued review messages. Canceled or definitively undelivered requests do not block the cooldown for later appointments; sent and uncertain deliveries still count. Disabling stops new requests; sent messages cannot be recalled.
Google Meet, Outlook and Teams meetings
Keep availability, video links and changes inside the regular booking lifecycle.
In your account: Services → Appointment type · Calendar connections under Calendar & appointments
Open guide
All settings & details
- Prepare the calendar
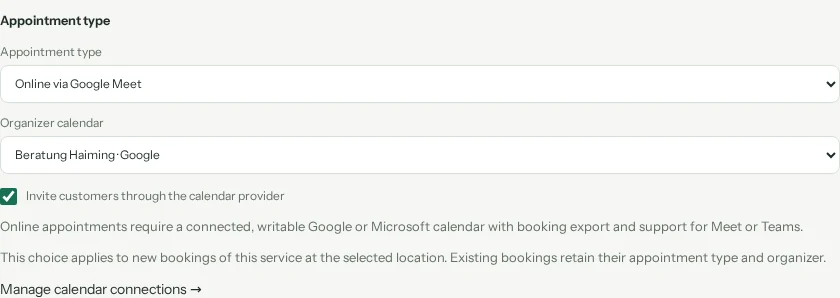
- Connect Google or Microsoft, choose the calendar and enable QORLYNT appointment export. The calendar must be writable. Teams needs a Microsoft 365 account with Teams online meetings enabled; Google Meet needs conference creation permission.
- Assign the organizer
- In each service, select On site, Online via Google Meet or Online via Microsoft Teams. Online modes are available only with a matching usable calendar connection. Choose the organizer calendar and optional customer invitation for this service at the current location. Calendar staff assignments determine which bookings it exports. Personal calendars require permissions in all affected locations. QORLYNT cannot create a meeting on behalf of an arbitrary employee.
- Respect confirmation
- Pending appointment requests do not create online meetings. Export starts after confirmation. Availability and approval rules apply equally to website, AI, MCP, Teams and external automation bookings.
- Link and invitation
- Google Meet or Teams supplies the link. It appears in the email notice and on the protected appointment page opened through the customer’s booking link. For direct delivery through WhatsApp or Telegram, configure and approve the confirmation template with {{meeting_link}} or {{online_termin}}. Customer invitation adds the customer to the provider event when their contact information and notification permission allow it. The appointment and notification permission are checked again immediately before the provider request. Changes discard an unsent stale request; the next synchronization uses the current state. Check WhatsApp templates first.
- Reschedule and cancel
- QORLYNT updates the same provider event when rescheduling and deletes it on cancellation. Attendees receive provider updates. Rebooking after cancellation creates a new meeting identity. Service changes apply to new bookings; existing appointments retain their type and organizer. The type is shown during booking, in appointment details and email. Messenger templates support {{appointment_type}} / {{terminart}}.
- External changes and conflicts
- Google and Outlook events block occupied times. External changes are synchronized and conflicts are shown for review. After an ambiguous timeout, provider state is reconciled before creating another event. Dismissing an issue does not resolve the underlying conflict.
- Outages and testing
- Use your own test contact to verify booking, approval, invitation, link, rescheduling and cancellation. Notices initially wait for delayed conference links; a link that becomes ready later receives its own message. Reconnect revoked accounts and resolve visible errors. Saved connection status does not replace a real provider test.
Teams bot and Teams notifications
Use QORLYNT in personal Teams chat and follow selected locations in channels.
In your account: External connections → Microsoft Teams
Open guide
All settings & details
- Prerequisites
- The operator must register the QORLYNT bot and your Teams organization must allow it. Connecting a Teams calendar does not install a bot. If QORLYNT reports it as unconfigured, complete server-side provider setup first.
- Download and install the Teams app
- Under External connections → Microsoft Teams, select “Download Teams app (.zip)”. Do not extract the ZIP. In Teams on desktop or in your browser, open Apps → Manage your apps → Upload an app → Upload a custom app, select the file and add QORLYNT. If uploading is unavailable or installation is blocked, give the ZIP to your Teams administrator. They can upload and allow it in Teams admin center under Teams apps → Manage apps → Upload new app. Each user then links their own QORLYNT account. Contact QORLYNT support if the download is unavailable; customers do not need their own Azure credentials for this.
- Personal pairing
- Name the connection, choose locations and individual permissions, then save. Send the single-use /connect code to the QORLYNT bot in personal chat within ten minutes. Keep the code private. Your verified Microsoft identity is linked to your signed-in QORLYNT user.
- Teams meetings when appointments are booked
- For automatic video appointments, connect a Teams-capable Microsoft 365 account under Calendar & appointments, select a writable calendar and enable appointment export. At the intended location, select Appointment type → Online via Microsoft Teams and the organizer calendar in the service. Creating the meeting does not require the bot app. QORLYNT creates it only after confirmation or approval and provides the link in the email notification and on the protected appointment page once Microsoft supplies it. For WhatsApp and Telegram, configure the confirmation template with {{meeting_link}} or {{online_termin}}; delivery permissions and WhatsApp template approval still apply. Even for a booking through the Teams bot, the service's appointment type decides whether it takes place on site, on Teams or on Google Meet. The expandable guide in the Teams tab links directly to calendar connections and services.
- Read information
- Send “Menu”, choose a location and open appointments, availability, contacts, services or callbacks. The bot is not a free-form AI chat. Free text opens the menu; selection cards and forms perform the operations. Responses use your current QORLYNT permissions.
- Perform actions
- Book, move or cancel appointments; create and complete callbacks; send a template message. Grant the supporting read tools for selection lists, such as contacts, services, calendar and templates. Approval-mode actions remain pending until reviewed under External connections → Pending approvals in QORLYNT.
- Configure a channel target
- Name a notification target, choose one location and its events. Send the /target code to the bot in the desired channel using your already personally paired Teams account. Send a test and inspect the log. Install the bot in the team first.
- Privacy and permissions
- Channel notifications contain event and target, not customer names or message content. Use personal bot chat for customer data and actions. Permission changes, location removal, account suspension and revocation are checked before further processing.
- Retries and failures
- Repeated clicks reuse the same request key. Rejected deliveries can be retried after correction. Check Teams first when delivery is uncertain; blind retries could create duplicate messages. Logs contain status and error codes. Re-pairing replaces personal identity linkage; revocation stops the bot and notification targets.